This is a short introduction to one of the most essential tools in software development: a version control system and in particular the Git tool.1
Table of contents
- Introduction to version control
- Tutorial
- Set up your own GitHub repositories
- Using git in PHY432
- Contributing to Open Source on GitHub
- More…
- Footnotes
Introduction to version control
A version control system (VCS) or source code management (SCM) tool manages files and tracks changes to those files. It stores the complete history and allows you to recover files at any stage of the history (think “undo” to the beginning). Any serious software project uses version control but its uses go beyond software, e.g., documents and data can also be version controlled.

A set of changes is called a commit. It typically contains changes to multiple files. It also contains a timestamp, information about the user who made the changes, and a commit message that explains the changes. The history consists of all the commits. The VCS stores the history in a storage area called a repository.
Modern distributed VCS such as Git or mercurial make it easy for multiple developers to work on the same project. They have support for merging changes from different people into a single new file, and for resolving conflicts, i.e., the case when the same part of a file was changed (the changes “collided”). Online platforms such as GitHub, Bitbucket, or GitLab provide free repositories in the cloud (but you don’t need these platforms to use a VCS!).
We will use Git. For the class you should get into the habit to version-control your work: in class notes, home works, and projects. You will use GitHub to submit code that you develop as part of your assignments and projects.
Tutorial
Let’s use git to manage what we have done so far.
If you want to read more about Git, have a look at the free Pro Git Book by Scott Chacon and Ben Straub and see the other resources.
Configuring Git
The first time you use git you need to tell it who you are: this information will be the user information in the commit history.
Activity Personalization
Your identity
Set your name and email.
Use a name and email address that can appear in the clear in the world because you will also use it to sign up and access the GitHub web site; if you are concerned about privacy, please review GitHub’s instructions for keeping your email address private. During this class we will use GitHub all the time:
- Homework will be submitted to private git repositories (only visible to you and the instructors).
- Projects will be submitted to private repositories only visible to you, your team, and the instructors.
- The final project can be submitted to a public repository, visible to everyone in the world (e.g., to use it as part of a portfolio)
Set the name and email associated with your commits (Use your own name and email address!) (and how to color output):
git config --global user.name "Darth Vader"
git config --global user.email "dvader@empire.gov"
git config --global color.ui "auto"
Line endings
There are subtle differences between how Windows and Linux/macOS treat line endings, which matters for programming. Without going into details, please set the following
On Windows
git config --global core.autocrlf trueOn macOS or Linux
git config --global core.autocrlf inputDefault branch name
Git histories can have different branches. The main development branch2 (the one we typically work on) is simply called “main”.3
Config settings listing
You can see a list of all your configuration settings with git config --list.
Activity Git Editor
You also tell what editor to use to write commit messages 4; here we configure Visual Studio Code to be used with git.
# choose Visual Studio Code as your editor
git config --global core.editor "code --wait"
(If you want to choose another editor such as nano, ask an instructor. If you do not make any choices, then the default editor is chose by the system and it might be vim, which is powerful but initially hard to learn.)
git basic command syntax
Git commands always follow the pattern
git <verb> [options] [arguments ...]
In particular, --help is always an option. Also try git help and git help tutorial.
Creating a repository
A repository starts from a directory with files.
Activity Create your ~/PHY432 working directory
During the class you will work on programs. We will store all this work in a specific directory for the class named ~/PHY432, to keep things tidy. ~/PHY432 will be our working directory.
Make a directory ~/PHY432 where you will do your work:5
mkdir ~/PHY432Create subdirectories for lessons:
cd ~/PHY432
mkdir 01_shell 02_git
If you have done the shell exercises then your PHY432 might now look like the following:
~/PHY432/
  ├── 01_shell
  │   ├── Documents
  │   │   └── work
  │   │       ├── TODO
  │   │       └── lesson
  │   └── data
  └── 02_git
Create a README.md file in 01_shell and 02_git with your editor that contains text like the following:
# 01 Shell

Work with the `bash` shell.
and
# 02 git

Working with the `git` *version control software*; see https://git-scm.com/.
(or write whatever you want — the exact content is not important). Also create a file 01_shell/hello.sh with content
# simple bash script example
echo "Hello ${USER}!"
Your directory structure should now have two README.md files and hello.sh (you can use ls -R ~/PHY432 to check):
~/PHY432/
  ├── 01_shell
  │   ├── Documents
  │   │   └── work
  │   │       ├── TODO
  │   │       └── lesson
  │   ├── README.md        <---- should be present
  │   ├── hello.sh         <---- should be present
  │   └── data
  └── 02_git
      └── README.md        <---- should be present
Activity Initializing a repository with git init
Turn the PHY432 working directory into a repository with the git init command:
cd ~/PHY432
git init
That’s it. Although, not much happened yet… except, check with
ls -laA new hidden directory ~/PHY432/.git/ appeared inside the working directory. This is your actual repository (or database) where Git stores all its information. Do not change anything in this directory (unless you really know what you are doing) and do not delete the .git directory. If you delete it, your repository is irrevocably gone (and there is no undo for that!).
Now try the (possibly) most-used git command:
git statuswhich gives
On branch main

No commits yet

Untracked files:
  (use "git add <file>..." to include in what will be committed)
	01_shell/
	02_git/
… but what does it mean? For this gobbledygook to make sense we need to know about the three states of git:
The three states of Git
For Git, a file can be in one of three states:
- Modified means that you have changed the file but have not committed it to your database yet; the file is in the working directory.
- Staged means that you have marked a modified file in its current version to go into your next commit snapshot; it lives in the staging area 6.
- Committed means that the data is safely stored in your local database (the git repository in the
.gitdirectory).

The basic Git workflow:
- modify files in working directory
- selectively stage changes that you want to include in your next commit (adds only those files to the staging area)
- commit your changes (takes files from the staging area and stores them permanently in your Git repository)
Activity Adding files
Prepare the modified files to be committed to the repository: git add adds files and directories to the staging area:
git add 02_git 01_shell/hello.sh
git status
Add more files and directories:
git add 01_shell
git status
(Use git reset FILENAME to unstage any files that you might have added accidentally. For instance, do not add backup files that were created by your editor.)
The files are not committed yet. You can do more work, add more files and directories…
Activity Committing
Check-in (or commit) your changes to your git repository:
git commit- When your editor pops up, enter a commit message: Convention:
- first line (<60 char): one line summary
- second line: blank
- third and following lines: more details The first line is mandatory (you cannot have a commit without a message), the rest is optional. The commit message should succinctly summarize the changes in the commit.
As an example, the following would make a good message:
initial commit of PHY432 class work * lesson 01 on shell * lesson 02 on git - After you wrote and saved the message (“save” in
code,^Oinnano;ito write andESC :wqto save and exit invim) and exited (“exit” incode,^Xinnano), your changes will be committed to the repository. - You can also supply the message as an argument:
git commit -m "one line summary of changes". - If you are having problems to make
git commitwith your editor work then instead usegit commit -m 'one line summary message'and debug this problem later.4 - Check the status with
git status…
For a new commit, add files and commit again.
For good measure:
git commitshould show that you have no uncommited changes in your working directory.
Activity History
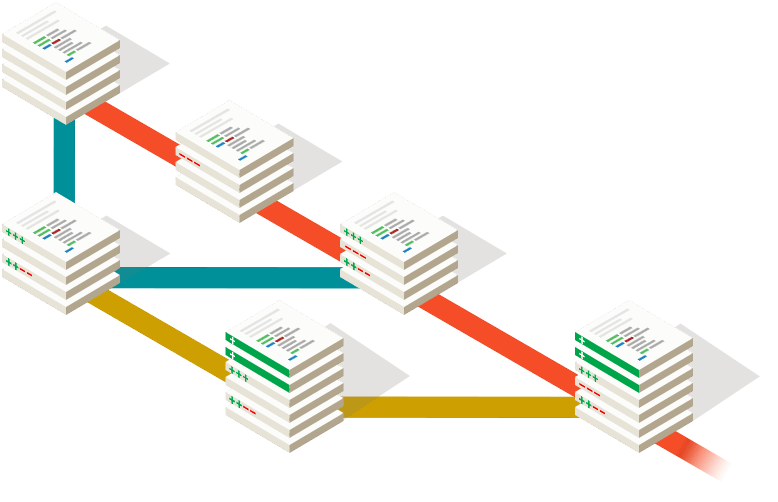
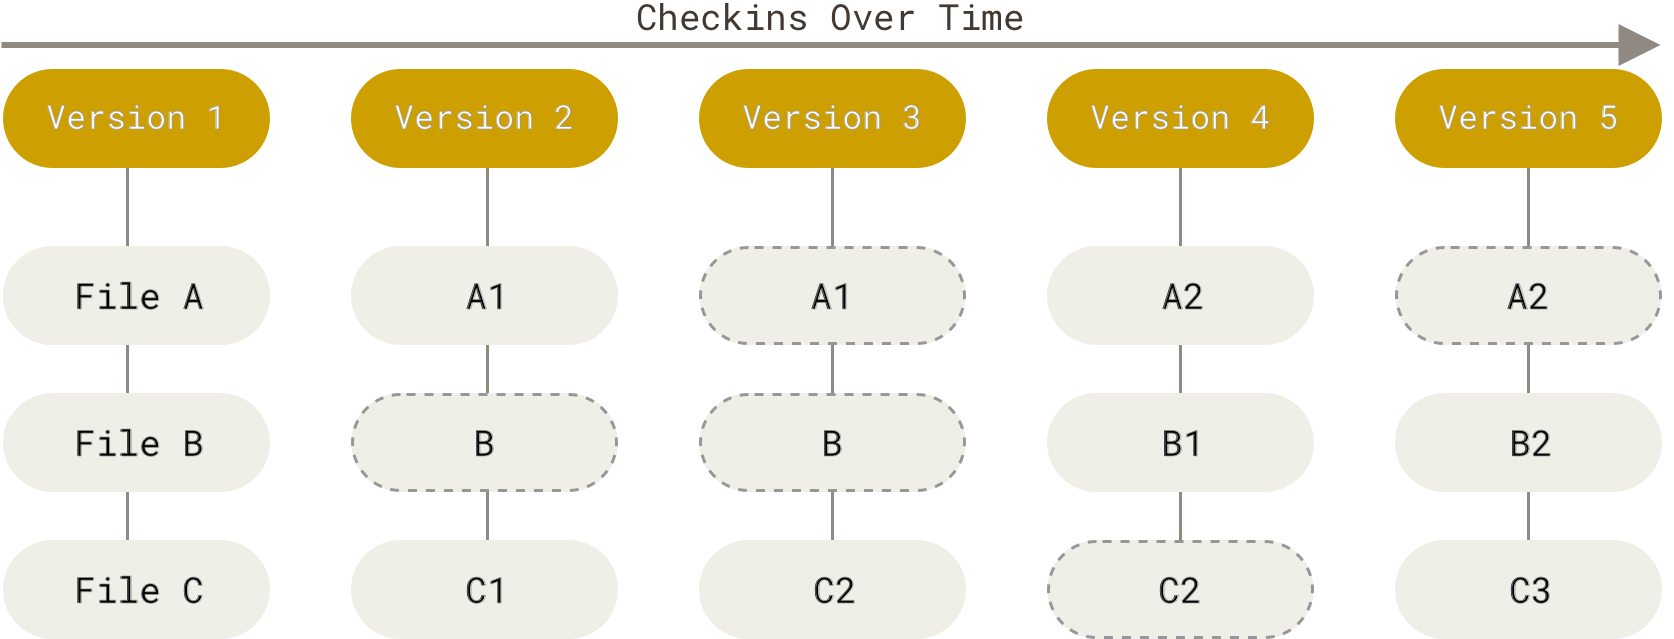
Git stores complete snapshots of your working tree in the repository: each version (or commit) can be used to recreate an exact state of all your files:
Read the history with
git logRemoving and renaming files
Removing files and directories via git allows you to get them back later.
git rm FILENAME
git rm -r DIRECTORY
Renaming is the same as removing the old file and adding the new one but there is also a simple command
git mv OLD NEWThe git rm and git mv commands are similar to the git add command in that they stage these changes; you still have to commit them.
Working with remote repositories
Repositories can live in your local file system or remotely on another server (“in the cloud”). Git provides a way to synchronize local and remote repositories.
There’s nothing special about remote repositories. They do not really differ from your local repository. Git is a distributed version control system and any repository holds all the relevant history.
There exist many services that host remote repositories “in the cloud”. One of them is GitHub (which we use for this class).7
Activity Initializing from remote: git clone
To initialize a local repository from a remote source we use git clone:
git clone URLFor instance, let’s clone the class repository where code and data will be posted by the instructor:
cd ~
git clone https://github.com/Py4Phy/PHY432-resources.git
cd PHY432-resources
Note:
- The local name of your repository can be any name you like but it is customary (and less confusing) if you go with the default, which is the remote repository name without the “.git” suffix, i.e., PHY432-resources for us.
For all other
gitcommands you must be inside your local repository:cd ~/PHY432-resources
Getting changes (reading): git pull
Update your local repository with any “upstream” changes by pulling from the remote repository:
git pull Updating the remote (writing): git push
If one has write access to a remote repository then one can also update the remote repository with local changes (commits) by pushing all commits that the local repository has:
git push(This will not work for PHY432-resources because only instructors have write access but we will use it below for your own GitHub repositories).
Set up your own GitHub repositories
Let’s set up a remote repository for your work in the class.
Activity Create GitHub repo and authentication
- Go to https://github.com and create a new account. It is free.8 Remember your GitHub username and the password.
- Create a new repository PHY432 (do not initialize it with a README or other file). You can make it private if you like.
- Note the repository URL https://github.com/USERNAME/PHY432.git
Set-up authentication with a Personal Access Token (classic) 9.
Follow the instructions to create a personal access token (classic).
- Name it “PHY432 class” (something that tells you what to use it for).
- You can set an expiration date at the end of the class in May (as a security precaution).
- For scope select only repo.
Generate the token. (It will look like “ghp_6HA…6i5Dy”.)
Copy the token, you will only see it once. Store it in a safe place.
- Warning: Treat the token like a password and keep it secret.
When you need to authenticate yourself in order to work with your GitHub repositories you will enter
- your username for username
- your personal access token instead of a password
You can always regenerate a new token.
Activity Link local and remote repositories
We now have to set the newly created, empty GitHub repository as the remote repo for your local one:
Add the remote repository to your local repository
~/PHY432(replace USERNAME with your GitHub username) 10:git remote add origin https://github.com/USERNAME/PHY432.gitWe named the remote “origin”, which is a common choice for the main repository. You can have many different remotes, just give them different names. You can list them with
git remote -vCheck that your local repository has a branch 2 called “main”:
git branchshould show
* mainIf the branch is called “main” then you don’t have to do anything else.
Else if you have an old version of git that still calls the default branch “master” 3, rename our branch to “main”
git branch -M mainso that the local repository agrees with the remote repository on GitHub. You only have to do the renaming once.
Activity Update (push) local content for the first time
push your local history to the remote repository:
git push --set-upstream origin main- Enter your GitHub USERNAME when asked for username
- Enter your personal access token when asked for a password.
Note
If you don’t want to enter your username/token every time then there are different ways to manage your credentials. GitHub recommends the Git Credential Manager. On Canvas I show you a simpler (but less safe) way to store the username/token in the remote repository URL in your local repository.10
Look at the web interface at https://github.com/USERNAME/PHY432 and see your changes appear.
You only need the --set-upstream origin main (or -u origin main) for the first time (it tells git which “branches” to associate with each other in local and remote) 2.
The next time, just run
git pushto update your remote repository with your local changes.
Activity Update (push) local content
For the rest of the semester, commit what you did during each class session to the ~/PHY432 repository on your laptop (and also push to your GitHub repository as a backup).
Note
Your GitHub repository is for in-class work. Do not commit homeworks there; you will receive private repositories for the duration of the class for this purpose.
All further push operations will simply be
git push
Try out the following
- update your
01_shell/hello.shscript with a second lineecho "Good bye, $USER". stage your changes
git add 01_shell/hello.shcommit changes
git commit -m 'add bye to hello script'push changes to remote repository
git push
Using git in PHY432
For the class we will use git and GitHub in multiple ways:
- Homework assignments and Participation Activities will be provided as repositories (using GitHub Classroom) and you will submit your work by pushing your solutions to a remote repository.
- Projects will be submitted to repositories.
Materials for the class will be made available in the resources repository Py4Phy/PHY432-resources.
The notes on the PHY432 workflow describe in more detail how you should use the resources repository and your own
~/PHY432workspace.- You should push your own work that you do during the class in your workspace to your own (private) PHY432 repository.
Contributing to Open Source on GitHub
GitHub is a provider for remote repositories. It enables you to easily contribute to other projects. This includes
- filing bug reports or feature requests (raising issues); for instance, if you do not agree with some of the Star Wars data from the previous lessons, raise an issue in the issue tracker for the PHY494-auxilliary repository.
- proposing to add your own code and changes through pull requests (but this is too advanced for a our short introduction today — see the additional resources under More…).
More…
- For a longer introductory tutorial see the Software Carpentry lesson on Version Control with Git.
- Resources to learn Git, including cheat sheets.
- Blischak JD, Davenport ER, Wilson G (2016). A Quick Introduction to Version Control with Git and GitHub. PLoS Comput Biol 12(1): e1004668. doi:10.1371/journal.pcbi.1004668
- For in-depth discussion read the Pro Git book by Scott Chacon and Ben Straub.
Footnotes
Acknowledgements: This lesson uses ideas from Software Carpentry’s Version Control with Git and includes an image from Jorge Cham’s PhD Comics “FINAL”.doc (which is © 2012 Jorge Cham). It also uses images and ideas from git-scm.com (used under the Creative Commons Attribution 3.0 Unported License) and from git-scm.com/book (used under the Creative Commons Attribution Non Commercial Share Alike 3.0 license). ↩
A branch is a parallel development history. Git allows you to split the history and then merge the branches again. This approach makes it easier to work on experimental features in parallel to a stable development line. It also allows multiple developers to work on a single project without disturbing each other’s work.
Branching is a more advanced topic, which is explained in the materials linked under More…. We barely scratched the surface of Git but this will be sufficient to already make good use of this very powerful tool. ↩ ↩2 ↩3
The main branch used to be called “master” but this name is falling rapidly out of favor and the generally used name is now main. Newer version of git use “main” by default but for consistency we can configure git to do so (or if we are working with an old version of
git):git config --global init.defaultBranch mainSee also Software Carpentry’s list of git configuration options for different editors and Associating text editors with Git for details, especially for Visual Studio Code.
For problems with setting up editors in Windows, see the StackOverflow question How can I set up an editor to work with Git on Windows? as a starting point for various recipes. ↩ ↩2
You might already have created the
~/PHY432directory in an earlier lesson. If this is the case then yourmkdir ~/PHY432command will fail. That’s ok. Just use the directory that you have. ↩Technically, the staging area (or index) is also located in the
.gitdirectory but that is not really relevant. Conceptually, the staging area is different from the Git repository. See more in Git Pro under Gettings Started – Git Basics. ↩Other commonly used git repository hosters are https://gitlab.com and https://bitbucket.org/. ↩
An unlimited number of public (i.e., visible for everyone) repositories are free on GitHub but private repositories cost money. However, if you use your school email address (e.g. @asu.edu) you can also get private repositories for free through the GitHub educational discount; see also the GitHub Education site. ↩
There are ways to set up remote repositories with using SSH keys instead of the HTTPS protocol, as described in the GitHub tutorial on Generating SSH keys. ↩
If you do not want to have to enter your username and token every time you do a remote operation, you can also store username and access token in the remote name. In the following, replace USERNAME with your GitHub username and TOKEN with your personal access token
git remote add origin https://USERNAME:TOKEN@github.com/USERNAME/PHY432.git(USERNAME and TOKEN are separated by a colon “
:” and prefixed to the URL with the “at” “@” character.)If you want to replace your remote setting then use
set-url:git remote set-url origin https://USERNAME:TOKEN@github.com/USERNAME/PHY432.gitWARNING
Note that storing your token in this way exposes it to anyone who can get hold of your computer because it is stored in clear text in the
.gitrepository and is visible withgit remote -v. ↩ ↩2